
Instead of manually copying leads into Mailchimp, connect your actual signup form or customer system to a Mailchimp audience so eligible contacts reach the right follow-up. The fVnnel is a growth partner, not a software application to authenticate, so this guide explains the workflow behind the request to connect fvnnel to mailchimp without inventing a native connector.
TL;DR
- To connect fvnnel to mailchimp, connect your lead source, not the agency name.
- The fVnnel suits established businesses that need acquisition, conversion, and tracking managed together.
- Mailchimp contact syncing needs explicit consent rules, field mapping, and duplicate handling.
- Test new signups and existing-contact updates separately before activating email automation.
Why this matters
A lead reaching your email audience is not the same as a customer entering a useful follow-up sequence. If the connection loses signup context, changes subscription status incorrectly, or triggers the wrong message, the workflow is connected but commercially wrong.
The fVnnel is best for established businesses that need growth strategy, acquisition, conversion, and tracking run as one system. That is a service relationship, not a replacement for Mailchimp. Start with The fVnnel when the problem spans those functions rather than a single broken field.
For your 2026 setup, define success before choosing a connection method: the right contact, the right permission, the right audience, and the right follow-up. A successful transfer alone does not establish any of those conditions.
Before you start
- Account access: Have access to the system that captures leads and permission to manage the destination Mailchimp audience. Identify who can approve a connection and who owns email automation.
- Source materials: Prepare your form fields, destination audience, consent wording, and follow-up requirements. Keep authentication credentials out of shared planning documents.
- The gotcha: An existing email address needs an update rule, not just a new-contact rule. Never let a routine profile update resubscribe someone who previously unsubscribed.
Do not begin with an integration search for the agency name. Begin with the software that stores or submits the lead: your website form, customer database, registration system, or another documented source. Its supported connection methods determine the implementation.
Lead-source configuration
Define the signup event
- Name the source system and the exact event that should send a record. Use a completed form submission rather than a page visit or an unfinished form.
- Separate a request for service from permission to receive marketing. Record the actual permission attached to the submission.
- Identify the email field and the information needed for follow-up. Include only fields with a clear purpose.
- Assign an owner for failures. Someone must receive and resolve rejected submissions rather than assume the automation works indefinitely.
Expected result: You can describe the trigger in one sentence, including the source, event, permission requirement, and destination. If that sentence remains vague, the setup is not ready.
A useful specification is: when an eligible signup is completed, create or update the matching Mailchimp contact and preserve the source context. This is a proposed workflow rule, not a claim that your current form already supports it.
Choose the connection route
Inspect the source system’s documented Mailchimp integration first. Confirm whether it supports the event, fields, and subscription behavior you need. If it does not, assess an automation service or a custom API connection, meaning software that exchanges records directly between systems.
Do not choose a route because it advertises a Mailchimp logo. Confirm what it actually sends and how it handles existing contacts. A connection that creates contacts but cannot preserve subscription status is not suitable for a general profile-update workflow.
For a 2026 implementation, document the selected route and its owner alongside the form specification. That makes later changes traceable when a form, audience, or automation changes.
Mailchimp audience configuration
Set the destination and field map
- Open Audience in Mailchimp and identify the audience intended for this workflow. Confirm the selection rather than relying on whichever audience was used last.
- Review its contact fields. Match each source field to the destination field by meaning, not by column position.
- Define the action for an existing email address. Specify which profile fields can change and which subscription states must remain untouched.
- Define how the source will be recorded, such as a dedicated field or a tag. Use a consistent naming convention and document it.
Expected result: Every transferred field has a defined destination, and an existing contact has a clear update rule. No field depends on someone remembering what an abbreviation meant.
Use the following as a mapping worksheet. These are information requirements, not promises about field labels in your form builder or connection service.
| Information | Purpose | Rule to define |
|---|---|---|
| Email address | Match the contact | Reject blank or malformed addresses |
| Name | Personalize relevant messages | Decide whether blank updates preserve existing values |
| Signup source | Explain where the lead originated | Use a consistent source value |
| Marketing permission | Determine subscription handling | Keep evidence in the system designated to store it |
| Interest or service | Route relevant follow-up | Accept only values your workflow recognizes |
Keep evidence of consent separate from a convenient marketing label. A tag can help organize contacts, but a tag alone does not explain what a person agreed to receive.
Keep audience organization intentional
Use the intended audience rather than creating another audience solely because a new form exists. If you need separate audiences, document the reason and how contact updates will be handled across them.
Tags and segments serve different purposes. A tag labels a contact; a segment groups contacts using defined conditions. Neither removes the need to verify subscription status before marketing follow-up.
The advantage of a simple structure is easier inspection. Its limitation is that naming and routing rules still need maintenance as your offers and signup paths change.
Connection testing and activation
Verify the full path
- Configure the source connection using its documented authorization process. Select the intended Mailchimp audience explicitly.
- Apply the field map and existing-contact rule. Keep email automation inactive while testing data transfer.
- Use 3 test contacts under your control: a new eligible signup, an existing subscribed contact, and an existing unsubscribed contact. Do not use customer addresses for experiments.
- Submit each through the real source workflow. Check the resulting contact, field values, source information, and subscription state in Mailchimp.
- Inspect the connection’s execution history or error output. Confirm that each submission produced the intended action, not merely a successful login.
Expected result: The new signup follows your permission rules, the existing subscriber receives only intended updates, and the unsubscribed contact remains unsubscribed.
Your 2026 acceptance checklist should record those outcomes before launch. A connection test that sends sample data directly from an automation editor does not prove that the real website form sends the same fields.
The sequence is straightforward: Source event, Permission check, Field mapping, Contact update, and Follow-up. Validate the handoff between each stage before adding more branches.
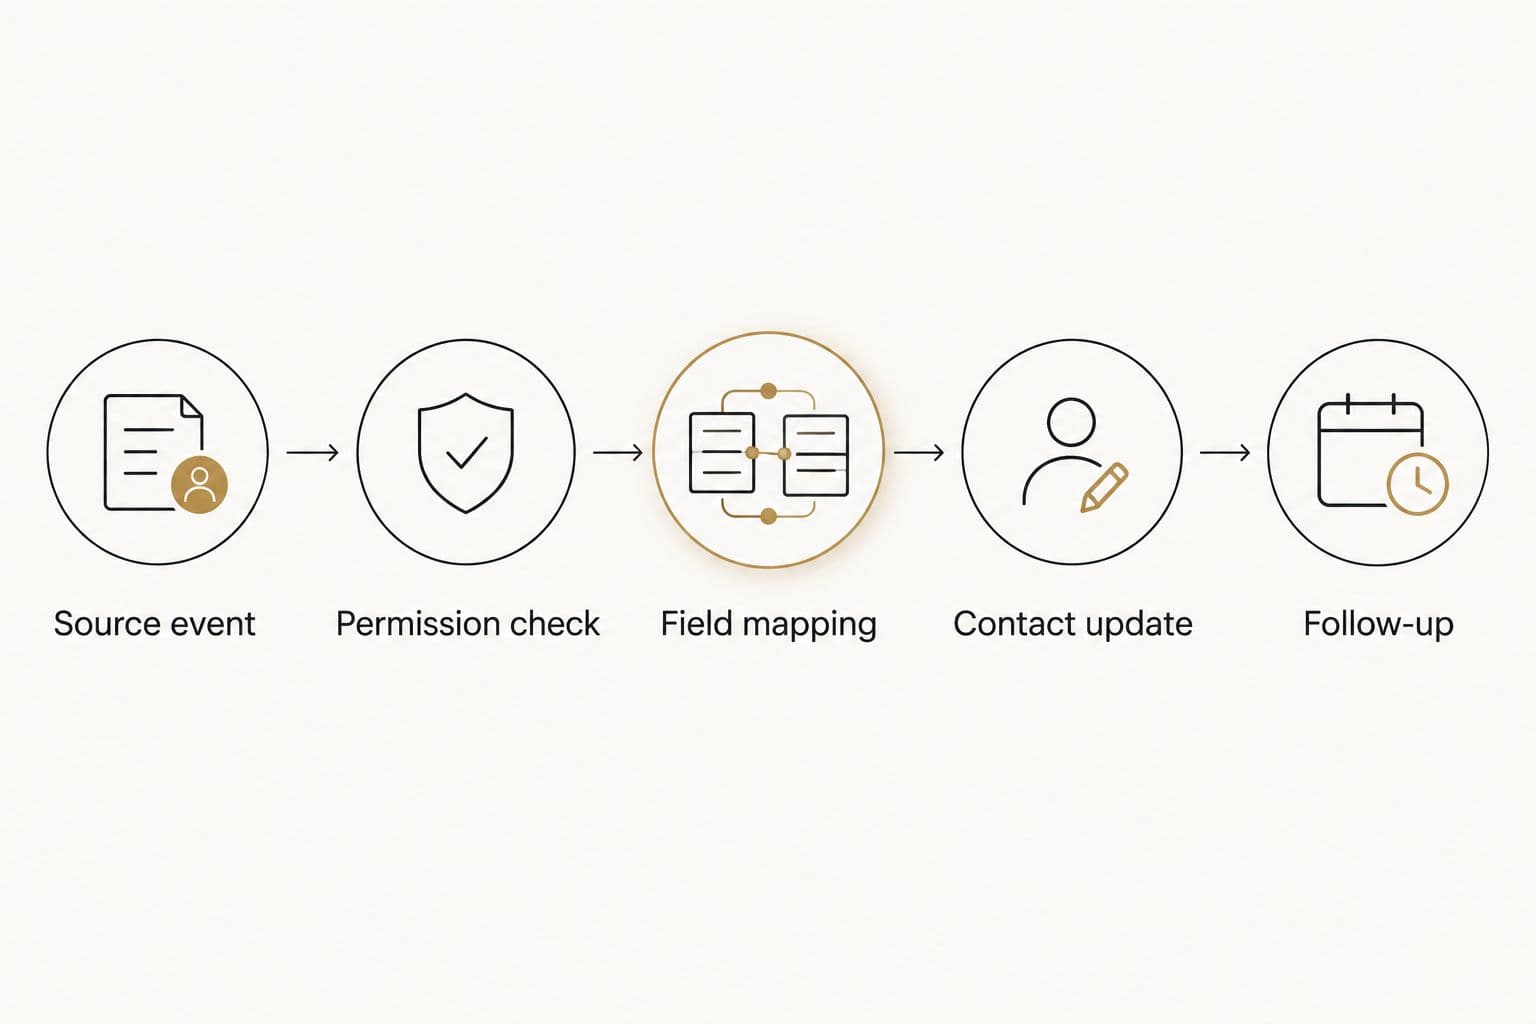
Validate contact handling before activating follow-up.
Activate follow-up separately
Once contact handling passes, configure the intended email automation in Mailchimp. Specify its entry condition, eligible subscription status, and whether someone can enter again.
Test the actual message path with an address you control. Check personalization, destination links, and the reason the contact entered. Do not use audience membership alone as proof that someone belongs in every welcome sequence.
Email delivery is a separate checkpoint from contact creation. For that part of the workflow, use the guide to email deliverability tools to frame the next investigation rather than rebuilding a connection that already transfers records correctly.
Update contacts when their details change
A second workflow is useful when a known contact changes an interest, profile detail, or service preference. Keep it separate from the initial signup so a routine edit does not behave like a new subscription.
| Workflow | Best for | Benefit | Limitation |
|---|---|---|---|
| New signup | People entering through an eligible signup | Preserves acquisition context and starts appropriate follow-up | Needs explicit permission and entry rules |
| Profile update | Known contacts changing relevant details | Keeps targeting information current | Must prevent unwanted overwrites and repeat welcome messages |
- Choose a meaningful update event in the source system. Avoid triggering on every internal edit if only specific fields matter.
- Match the existing contact using your documented identity rule. Treat an email-address change as a separate identity decision, not an ordinary text-field update.
- Send only the fields intended to change. Decide whether an empty value means delete the old value or leave it unchanged.
- Preserve subscription status unless you are processing a separate, valid subscription event.
- Confirm that the update does not restart signup follow-up unintentionally.
Expected result: The contact’s relevant details change without creating another record or restarting the wrong sequence. These are 2 workflows with different purposes, even when they share the same destination audience.
Troubleshooting
The submission never reaches Mailchimp
Check whether the source event occurred, then inspect the connection’s execution history. Confirm authorization and audience selection before changing field mappings. If the connection never received the event, the fault is upstream of Mailchimp contact creation.
A contact appears, but information is missing
Compare the actual source submission with the mapped destination fields. Look for different field names, empty values, or an unsupported destination format. Correct the mapping and repeat the real form submission, not just the connection editor’s sample test.
Existing contacts lose useful information
Review overwrite behavior. A blank source value should not erase a populated field unless that deletion is intentional. Restrict profile updates to fields the source system is authorized to maintain.
An unsubscribed contact becomes subscribed
Stop the workflow and inspect the subscription action immediately. Separate profile updates from subscription requests, correct the rule, and retest with your controlled unsubscribed contact. Do not resume until that contact’s status stays unchanged during ordinary updates.
Contacts sync, but follow-up does not start
Inspect the email automation’s entry conditions and the contact’s eligibility. Confirm whether the trigger requires a new signup, a particular tag, or another event. Repeatedly resending the contact is not a substitute for fixing the entry condition.
Customize your workflow
After the basic connection works, add the context that changes your next commercial action. A declared interest can shape follow-up. A source field can help connect acquisition activity with later outcomes. Extra fields without a decision attached create maintenance, not insight.
Keep your 2026 workflow specification with the people responsible for acquisition and email. Record who can change the form, mappings, subscription rules, and automation entry conditions. Review those dependencies whenever an upstream form changes.
The fVnnel’s growth work includes strategy, paid acquisition, performance creative, websites and conversion, SEO, and tech and tracking. That scope fits a system-level constraint. It does not establish that a particular website form has a native Mailchimp connector.
Connect the work to business outcomes
Discuss the constraint across acquisition, conversion, and tracking.
FAQ
How do I connect fvnnel to mailchimp?
Connect the software capturing your leads to your intended Mailchimp audience. The fVnnel is a growth partner, so the implementation depends on your actual form or customer system, not an agency login.
Does The fVnnel have a native Mailchimp integration?
This guide does not establish a native connector. Identify your lead-source software and check its documented Mailchimp connection methods before choosing an implementation.
What access do I need before connecting Mailchimp?
You need access to your lead source and permission to manage the destination Mailchimp audience. You also need the field map, permission rules, and an owner for connection failures.
Should an existing contact be added again?
An existing contact needs a defined update action rather than an assumption that every submission is a new subscription. Specify which fields change and preserve unsubscribe status during routine updates.
Can I start a welcome email whenever a contact changes?
Use a separate profile-update workflow rather than restarting welcome messages on every change. Define entry and repeat-entry conditions around the intended customer action.
How do I test the connection without emailing customers?
Use test addresses you control and keep email automation inactive while checking contact transfer. Verify new-signup, existing-subscriber, and unsubscribed-contact behavior before testing messages.
Why does Mailchimp show the contact but not send the email?
Contact creation and email automation are separate stages. Check subscription eligibility and the automation’s entry conditions before changing a working data connection.
One last thing
The most valuable test is the contact who should not receive a message. A workflow that accepts a new signup but mishandles an unsubscribe is not ready. Make that exclusion test part of your 2026 launch approval, not an investigation after a complaint.